
Mastering barbecuing ribs on a charcoal grill is the key to achieving tender, juicy, and flavorful ribs with that authentic smoky taste. Unlike gas grilling, charcoal grilling infuses the meat with a rich smokiness while giving you control over heat zones for slow, even cooking. Whether you’re a beginner or a seasoned pitmaster, these step-by-step instructions will help you create ribs that are fall-off-the-bone delicious.
Why Charcoal Grill for Ribs?
Charcoal grills provide a unique flavor and cooking environment that gas grills can’t replicate. The charcoal’s smoke imparts that signature taste, and the ability to adjust vents and add wood chips lets you customize your smoke intensity and heat level. This makes charcoal grills perfect for slow-cooked ribs.
Ingredients
- 2 racks of pork ribs (baby back or spare ribs)
- Your favorite dry rub (paprika, brown sugar, salt, black pepper, garlic powder, onion powder)
- Barbecue sauce (optional)
- Wood chips (hickory, applewood, or mesquite)
Tools Needed
- Charcoal grill with lid
- Charcoal chimney starter
- Aluminum foil
- Spray bottle with apple juice or water
- Meat thermometer
- Tongs and grill gloves
Step-by-Step Guide: Barbecuing Ribs on a Charcoal Grill

1. Prepare the Ribs
Remove the thin membrane on the back of the ribs for better seasoning absorption and tenderness. Generously apply your dry rub on all sides and let the ribs sit for at least 30 minutes to an hour.
2. Light the Charcoal
Use a charcoal chimney starter to light the charcoal evenly. When the coals are covered in gray ash (about 15-20 minutes), spread them on one side of the grill to create a two-zone fire: one side for direct heat, the other for indirect heat.
3. Add Wood Chips
Soak wood chips in water for 30 minutes, then scatter a handful over the hot coals to create smoke.
4. Start Grilling
Place the ribs bone-side down on the cooler side of the grill (indirect heat). Cover the grill with the lid, positioning the vent over the ribs to draw smoke and heat.
5. Maintain Temperature
Keep the grill temperature steady between 225°F and 275°F. Add charcoal or wood chips as needed every 30-45 minutes.
6. Spray and Wrap
Every 45 minutes, spritz the ribs with apple juice or water to keep them moist. After about 2 hours, wrap the ribs tightly in aluminum foil and return to the grill to cook for another hour.
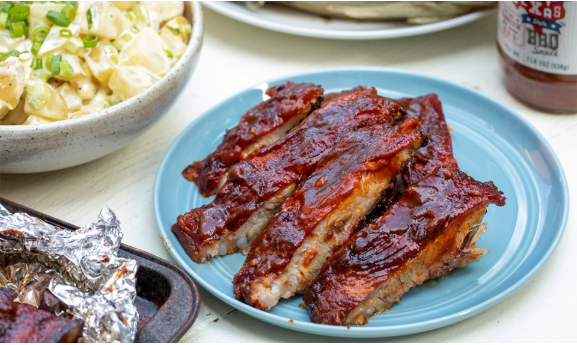
7. Finish and Sauce (Optional)
Unwrap the ribs and place them back on the grill over indirect heat. Brush with barbecue sauce and cook for an additional 15-20 minutes to set the glaze.
8. Check Doneness
Ribs are done when they reach an internal temperature of 190°F to 203°F and the meat easily pulls away from the bones.
Read also:-Pollo Asado Recipe: Juicy, Flavorful Grilled Mexican Chicken
Tips for Perfect Barbecued Ribs
- Use a meat thermometer to avoid overcooking.
- Don’t rush the cooking process; low and slow is the secret.
- Experiment with different wood chips for unique flavors.
- Let the ribs rest for 10 minutes before slicing.
Vedeo:-
Conclusion
Barbecuing ribs on a charcoal grill is a rewarding cooking method that delivers smoky, tender ribs full of rich flavor. By following these steps and practicing patience, you can impress your family and friends with ribs that rival any professional barbecue joint.
Heya this is kind of of off topic but I was wondering if
blogs use WYSIWYG editors or if you have to manually code with HTML.
I’m starting a blog soon but have no coding skills so I
wanted to get advice from someone with experience.
Any help would be enormously appreciated!
Hey! 😊 That’s a great question—no worries about it being a bit off-topic. Most modern blogging platforms like WordPress, Blogger, or Wix come with WYSIWYG (What You See Is What You Get) editors, so you don’t need to know any coding to get started. You can format text, add images, and build pages visually—just like editing a Word document.
That said, knowing a little HTML can give you more control, but it’s definitely not required at the beginning. I’d say go for it and start blogging!
And if you want help setting up your site, feel free to contact us—we’d love to help you get started! 😊
What’s up to all, as I am really eager of reading this website’s post to be updated
daily. It consists of nice data.
Hey there! 😊 Thanks a lot for your kind words and enthusiasm. It’s awesome to hear that you enjoy reading the posts and find the content helpful. I’m working on bringing more updates and valuable info regularly—so stay tuned and keep visiting! Your support means a lot!
It is appropriate time to make some plans for the future and it is time to be happy.
I’ve learn this submit and if I may just I desire to counsel you some interesting issues or
advice. Maybe you could write subsequent articles relating to this article.
I desire to read even more issues about it!
Thank you so much for your thoughtful comment! 😊 I’m really glad you enjoyed the article and found it inspiring. I’d absolutely love to hear your suggestions or ideas for future topics—feel free to share them anytime! I’m always looking to create content that truly connects with readers, and your feedback helps make that possible. Stay tuned for more!